
OKTO35 Mk2
My second version of an Analog 35mm Motion Picture Film Camera.
At last, a cheap and easy way to shoot and scan 35mm film movies.
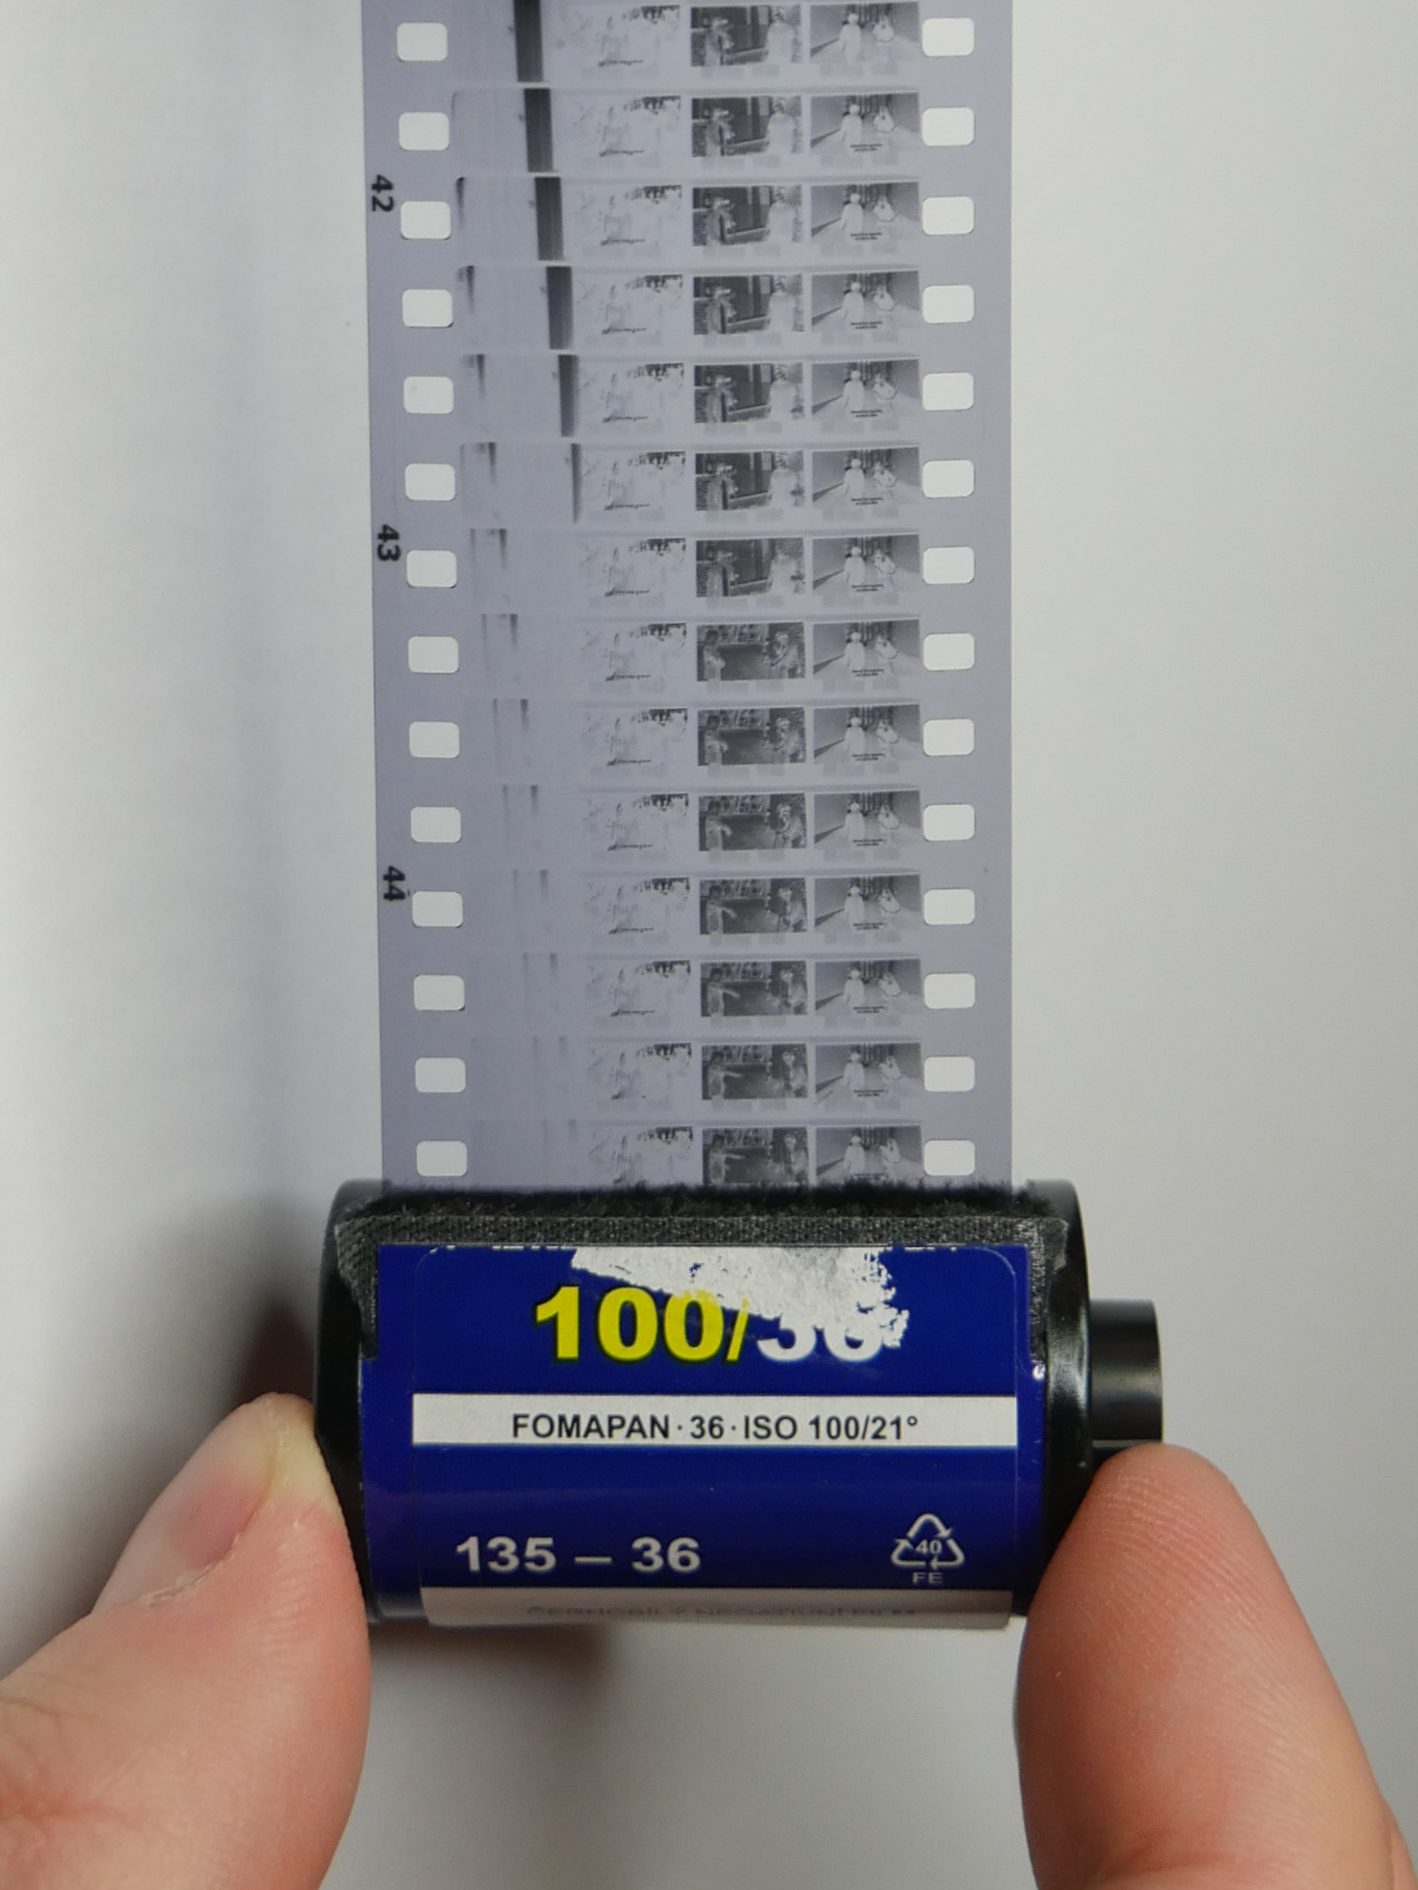
Shooting movies on 35mm film and scanning them right at home. A faster and more cost-effective alternative to the conventional way. Well, sign me up!
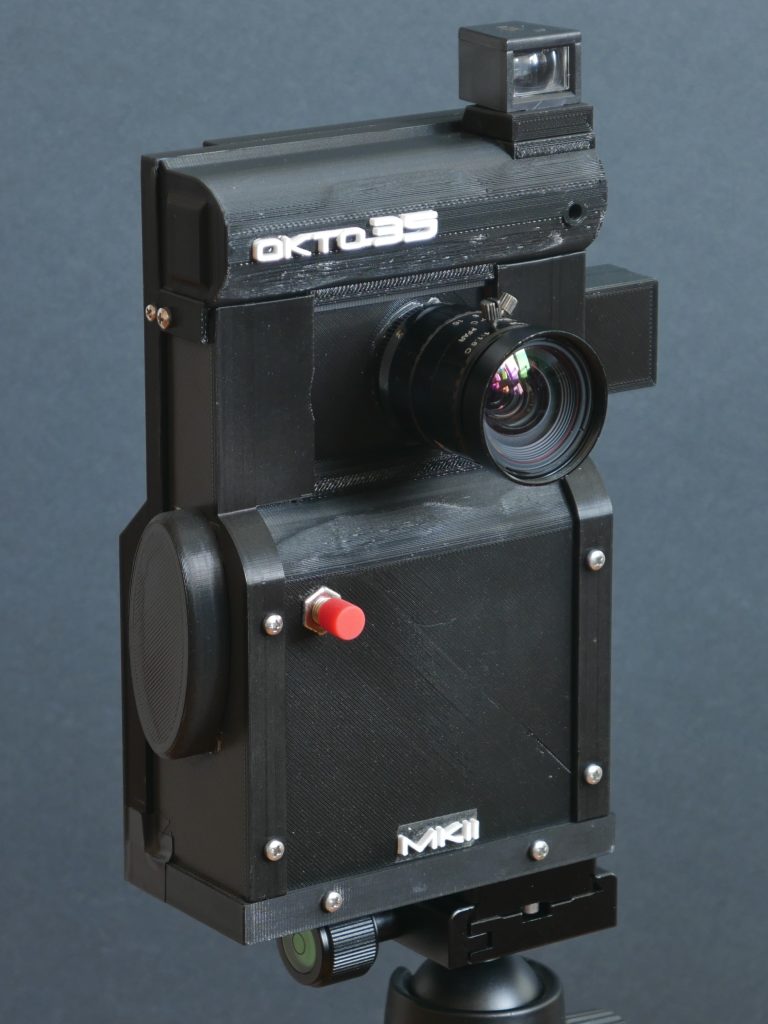
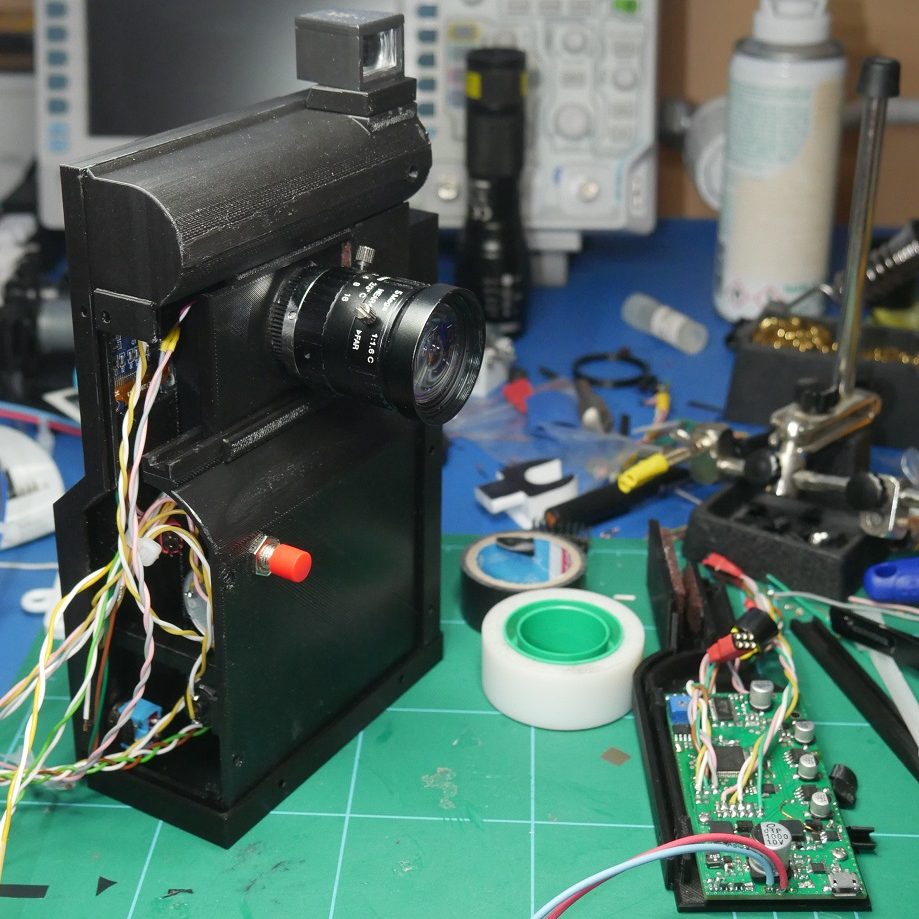
This was my second version of a DIY 35mm Motion Picture Film Camera with built-in film scanning capability. The OKTO35 Mk2 was a complete makeover. Refined and miniaturized CAD design with 3D printed housing and precision frame advance mechanism, custom-designed PCB and firmware, packed with features and more. A truly handheld and portable camera.
The main reason for building such a camera in the first place was due to Super8’s high shooting costs, waiting for scanned results, and the continuation from the first camera version OKTO35 Mk1. Coming from CAD designing with 3D printing and coding knowledge background, and being an electronics designer myself, I decided to go for it and build this second camera version.
I was very happy with the camera usage and its scanned results. This got me thinking that maybe this would be worthy of a public announcement in the form of a YouTube video presentation. Upon receiving viewers’ unanimous interest in project continuation, I decided to start building my third camera version OKTO35 Mk3.
CAMERA FEATURES
The camera can operate in 4 different modes. The movie mode enables normal shooting at a set framerate. In photo mode, it acts as a still camera at a set shutter speed. Timelapse is used for shooting at longer exposure times, and in scanner mode (connected and optically coupled to a DSLR), it functions as a developed film scanner. There are also other useful features, which are hardware and firmware-based. Such as:
- 1-perf pulldown movement in 4-track exposure method on 35mm film
- fully automatic frame advance with rewind and film track shift
- interchangeable C-mount lens support
- gate exposure size at 6.2 × 4.6 [mm]
- MOVIE framerate 10 – 24 FPS at fixed 160° shutter angle
- PHOTO shutter speed BULB – 1/100s
- TIMELAPSE interval 1 – 6 sec
- built-in scene center-weighted lightmeter sensor with displayed F-stop recommendation
- user-friendly GUI via bright 1″ OLED display and thumb joystick button
- indicated remaining shooting time, current settings, battery life …
- timer-based trigger delay 2 – 5 – 10 sec
- magnetically sealed film cover with pressure plate and easy film cartridge loading
- built-in rechargeable LiPo battery
- standard tripod 1/4″ screw mount
- frame-by-frame scanning sync connection with a DSLR camera
- supports multiple-sized 35mm film roll cartridges
- supports film ISO range 50 – 3200
- cold shoe mount with an optical viewfinder
- buzzer for audio cues and warnings
- compact and ergonomically designed camera
- powered by STM32 microprocessor
EXTERNALS
In contrast to OKTO35 Mk1’s external design, the Mk2’s was a complete makeover with much more refined and miniaturized housing. Made from 2 mm thick 3D-printed black PLA plastic interlocking panels, in order to achieve good light-tightness.
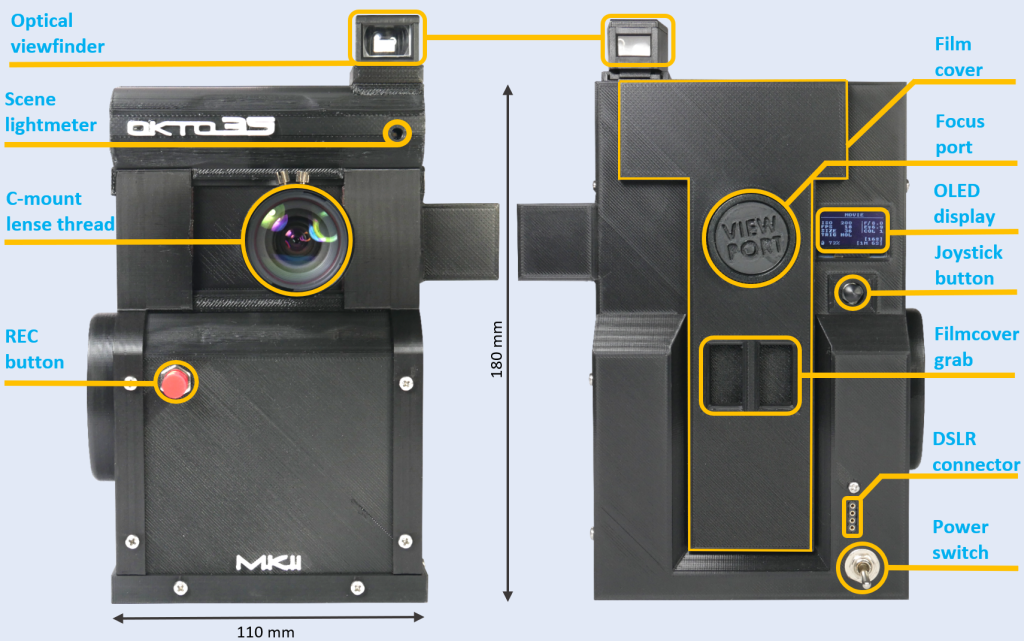
The front face features a C-mount lens thread, a scene lightmeter sensor for lens F-stop recommendation, an optical viewfinder, and the camera’s trigger button.
On the back side, the user operates the camera’s GUI via a bright 1″ OLED display and a thumb joystick button. The magnetically sealed film cover holds the loaded film in place. Checking the lens focus can be done via the open focus port and attached magnifying lens. When scanning mode is initiated, the DSLR trigger connector port sends contact pulses via cable to a DSLR camera in order to achieve a sync frame-by-frame scan.
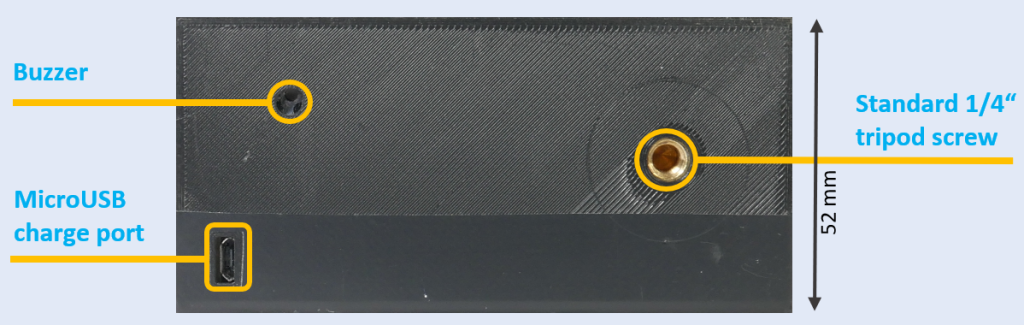
At the bottom, there is a buzzer hole for audio cues and warnings, a standard tripod 1/4″ screw mount, and a micro USB port for internal battery charging.
The simple and short camera’s name ‘OKTO35’ is composed of two parts. ‘OKTO’ symbolizes the number 8 due to the camera’s very similar Super 8 gate exposure size, and the last part ’35’ addresses the 35mm film width.
INTERNALS
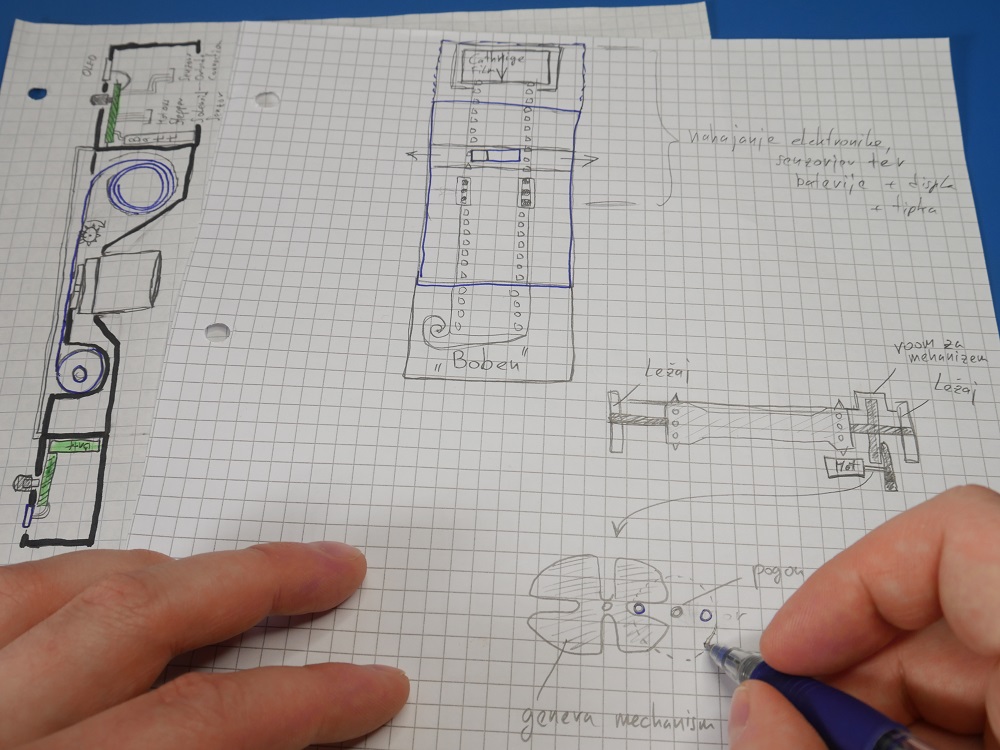
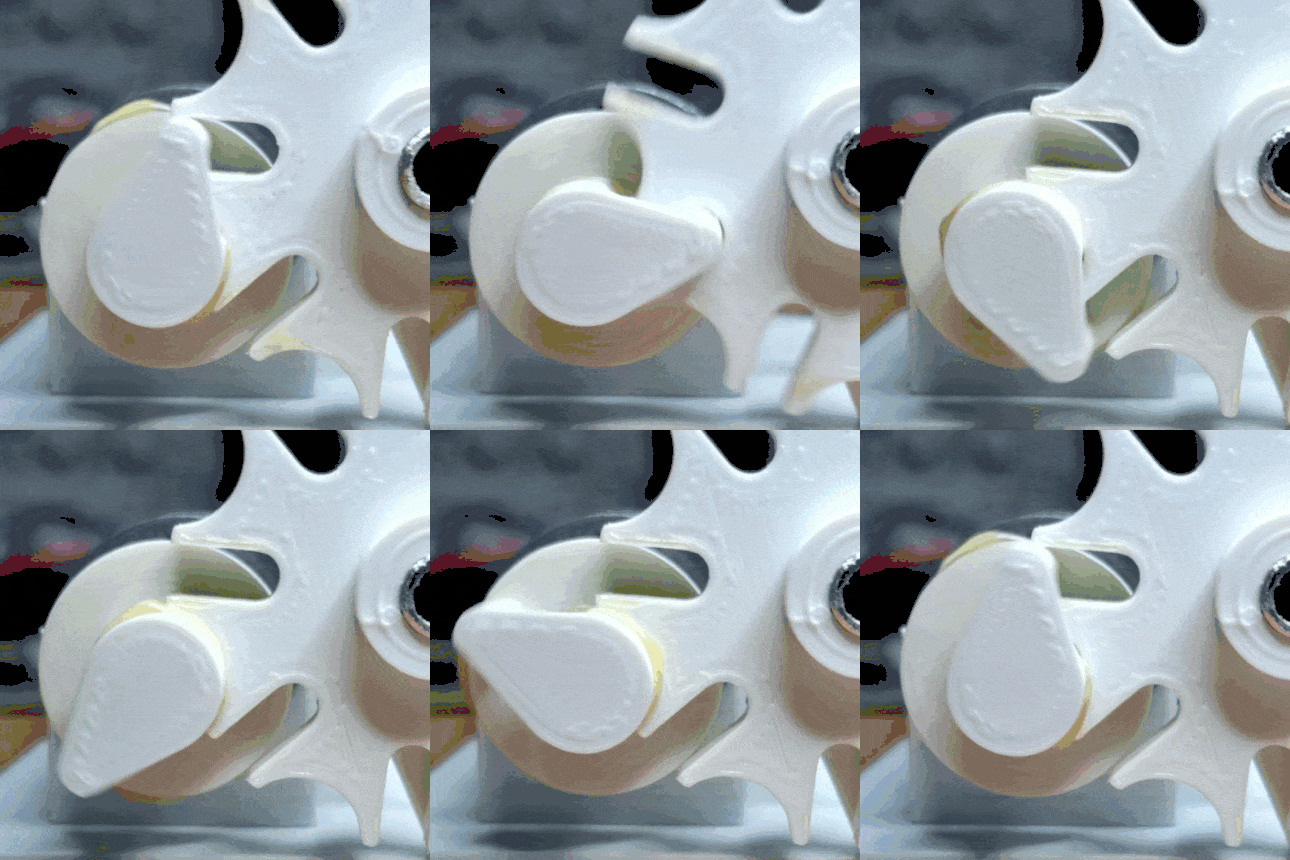
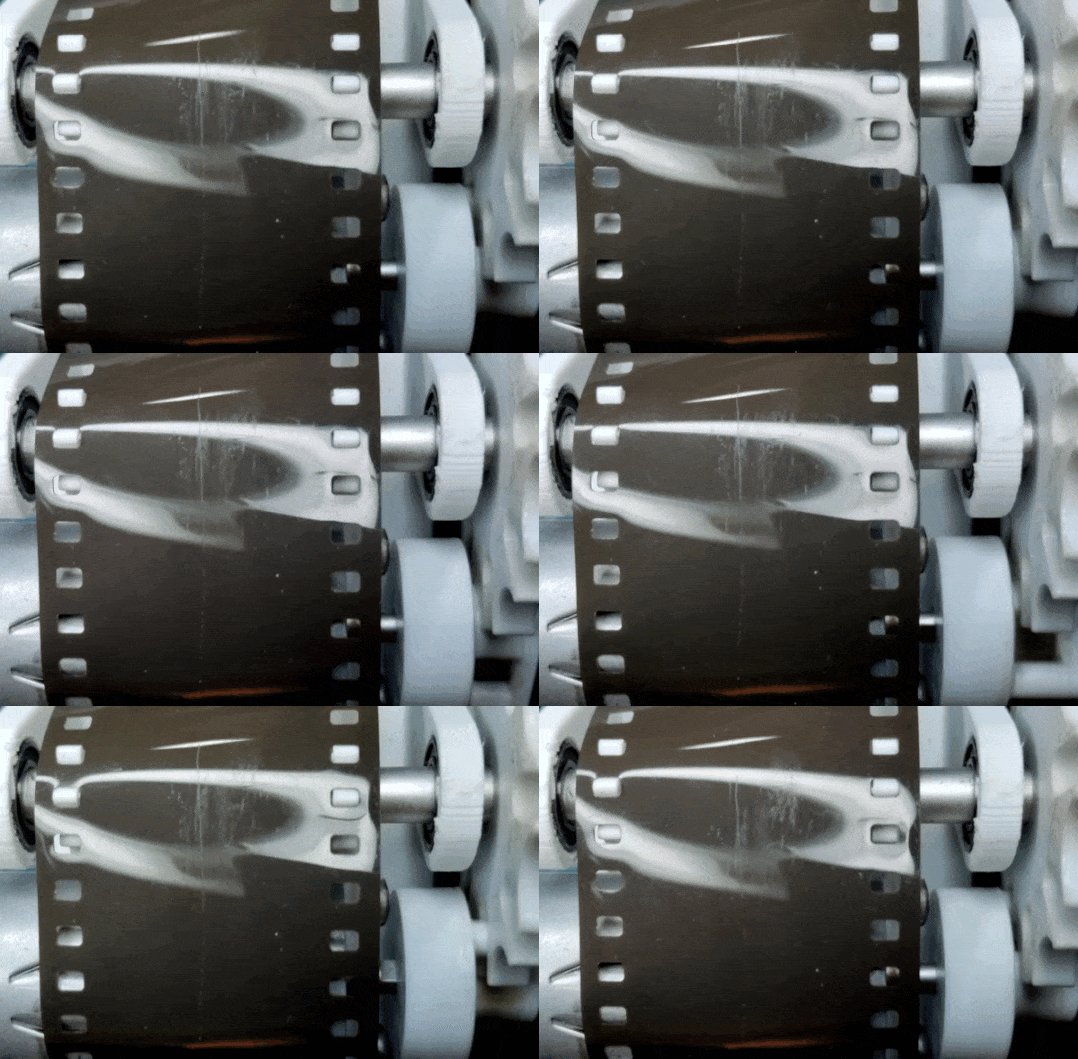
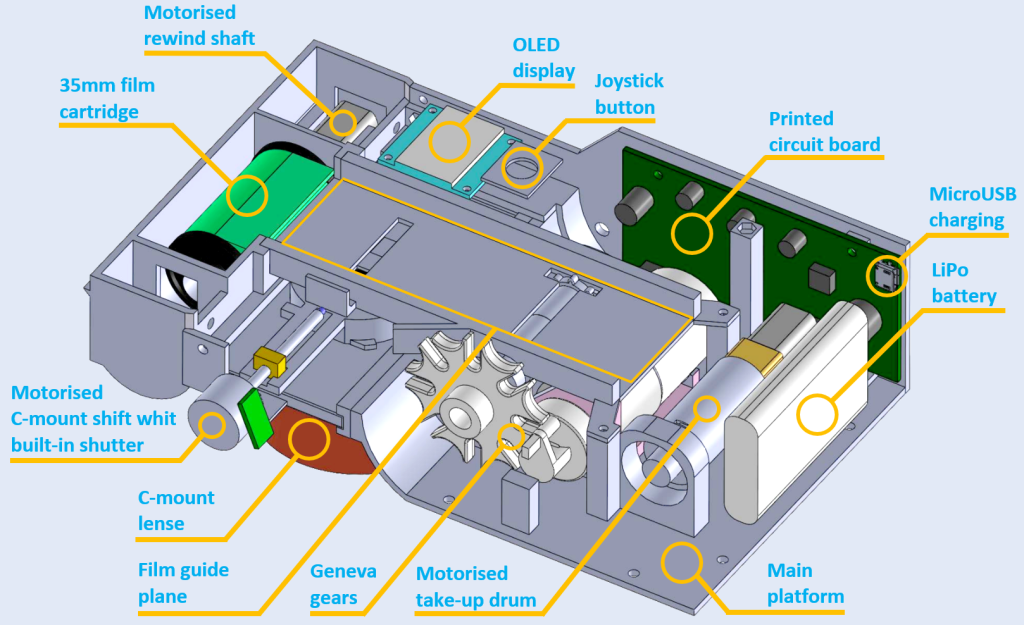
Firstly, I roughly sketched an idea on paper of how the camera’s internals should look like. After some more considerations, it was time for CAD designing the first 3D-printed part: a Geneva drive intermittent mechanism for frame advancing, driven by a simple DC motor. Transforming a continuous rotational movement into an intermittent one, directly into the sprocket tooth gear, resulting in a 1-perf pulldown style. This beautifully translates into one frame per sprocket hole on 35mm film with lots of horizontal space between for the multi-track exposure method.
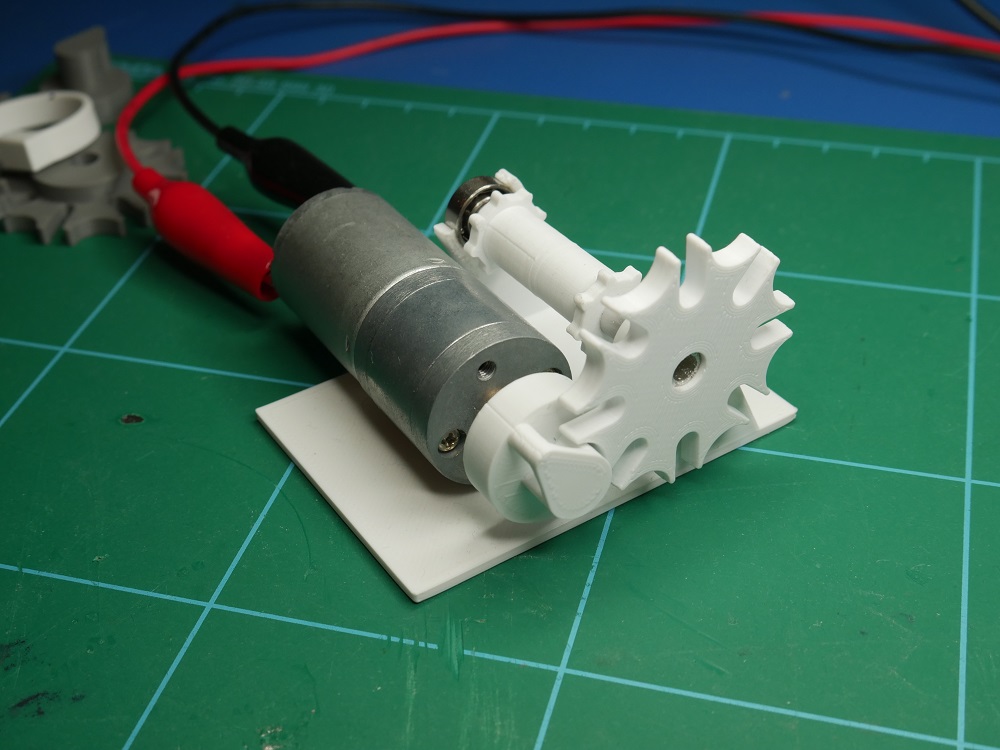
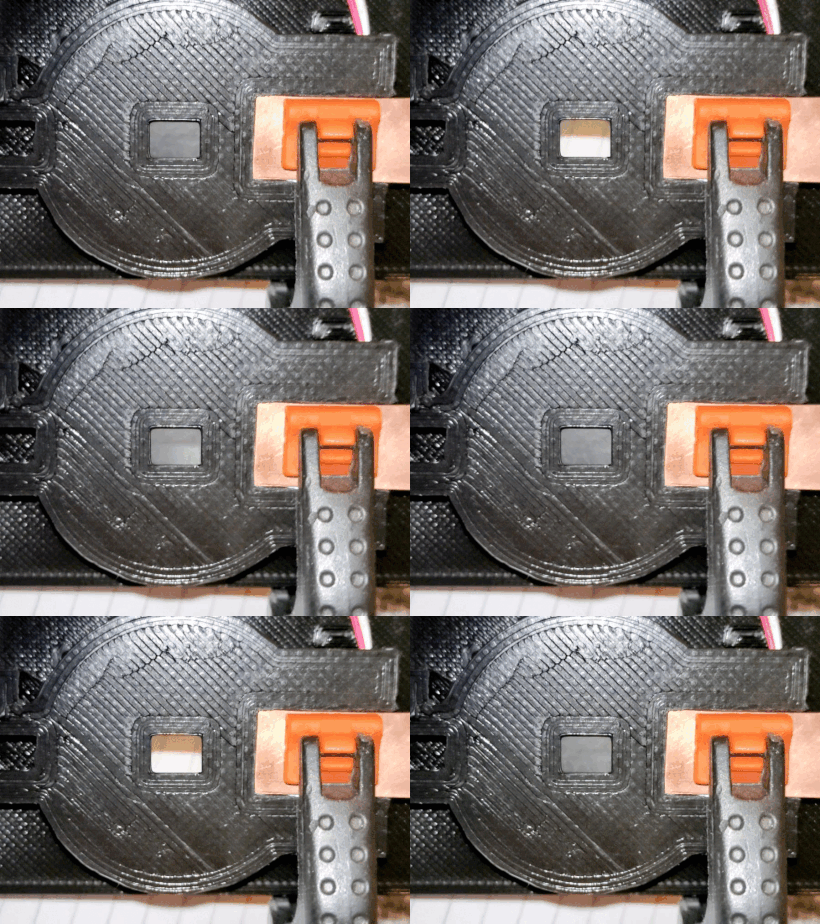
Soon, other components followed, such as a film guide plane for transporting film from its cartridge to the take-up drum, a motorized C-mount holder with 4-track exposure capacity and built-in solenoid gate shutter, PCB, lightmeter sensor, OLED display, buttons, LiPo battery, and more.
The intent was also to have a simple film-loading procedure that doesn’t require any pre-slicing/combining or external reel film loading. Just drop and load a standard 35mm cartridge, and you are ready to go. For the lens, I’ve chosen the interchangeable C-mount system due to its compactness and large focal length selection from wide-angle to telephoto. These can be found used and still in production for machine vision at affordable prices.
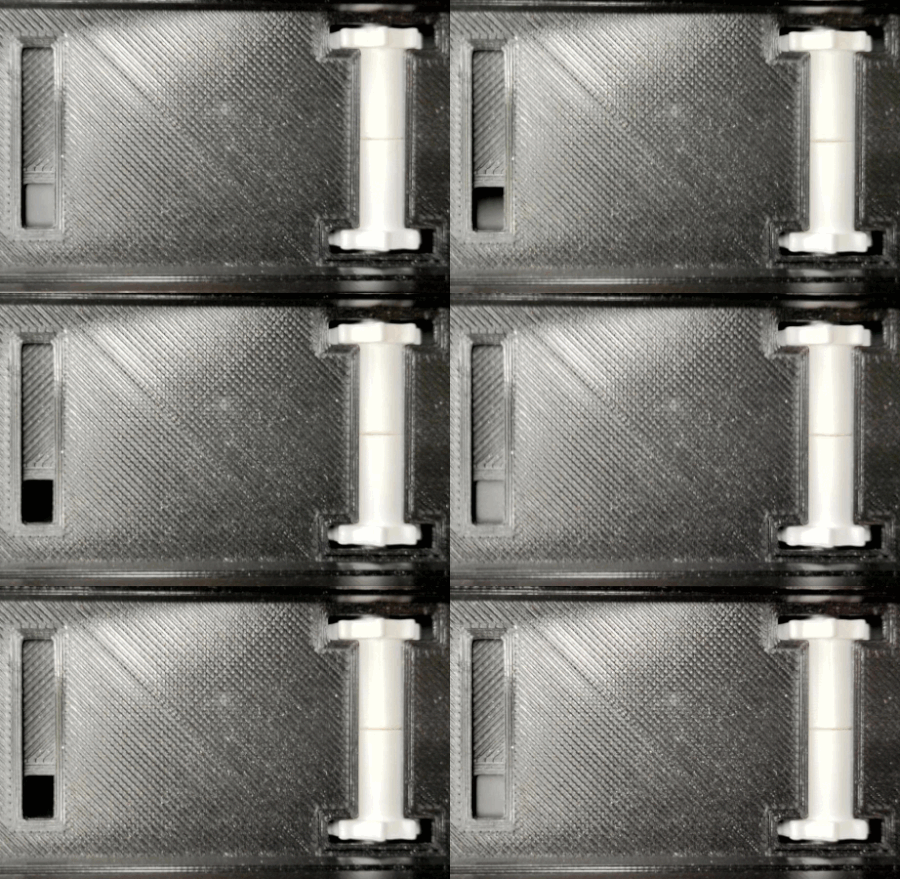
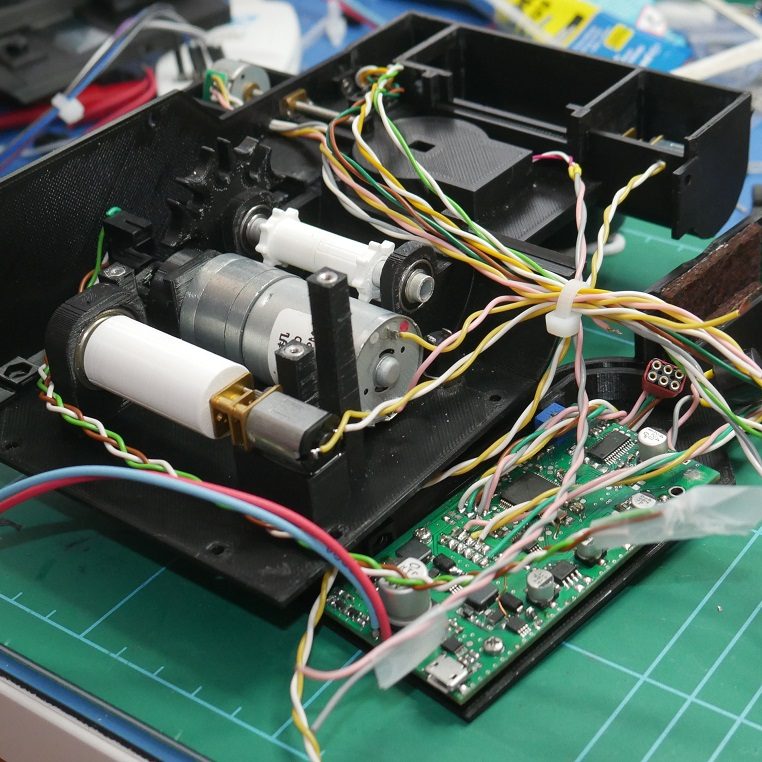
The PCB was custom-designed to contain all the necessary components required for the camera’s operation. The board was fitted with a power and charging management system, motor/solenoid drivers, STM32 microprocessor, various ICs … All powered by a rechargeable LiPo battery via microUSB connection.
Once the camera was assembled, it was time for coding. At the start, I’ve concluded that the camera would need only two modes of operation: shooting and scanning. The same as in OKTO35 Mk1. But down the line line I decided, why not spice things up with an additional two modes. In total, there are now 4 different modes of operation: movie, photo, timelapse, and scanner.
All this was created under a user-friendly GUI with a simple menu navigation system using an OLED display and a thumb joystick button. This system is also capable of processing input data from various camera sensors and displaying it to the user, such as recommended F-stop, remaining shooting time, battery life, current camera settings, etc. Nearing the end of coding, many other useful features were added: a timer, shooting button mode, audio cues, and a warning system. Coding was done in the C language in the STM32 IDE environment.
GUI
The chosen GUI (graphical user interface) idea was a simple 3-page visually circulating system. It consists of Dashboard – Settings – General. Switching between these pages is done by the left/right thumb joystick button, and the current page option further selection with up/down action.

The content of both the Dashboard and Settings pages changes depending on the set camera mode. The four different modes of operation are: Movie, Photo, Timelapse, and Scanner.

In the Movie mode, the camera shoots at a set framerate. It displays the remaining shooting time in minutes and seconds. In Photo mode, the camera acts as a still camera at a set shutter speed. This mode is also useful for making a stop-animation movie. It displays the remaining number of frames. The timelapse is similar to Movie mode, except here the exposure times are much longer. Here, the user can set the interval time and duration.
All three modes can be used interchangeably on the same loaded film cartridge.
In scanner mode, the camera changes into a film scanning machine. The film cartridge roll, which was previously exposed and developed, can now be reloaded and scanned in the synchronized frame-by-frame method. By swapping the front lens and optically coupling with a DSLR or a Mirrorless digital camera with a wired trigger connection, the fun can now begin.
Other information, such as user settings, recommended F-stop, battery percentage, and remaining film are always present on the Dashboard.
CAMERA OPERATION
Operating the OKTO35 Mk2 is quite simple. Like any camera, the user deals with lens settings and pointing the camera in the right direction. Here, an 8mm C-mount lens is best for general shooting use.
But firstly, a new film cartridge roll is placed between the motorized rewind shaft and the holding block. The film is then extracted from the cartridge, placed down the film guide plane, past the exposure gate and the main drive, and attached to a motorized take-up drum. Here, the film cover acts as a film pressure plate and a guide. It’s held down by strong neodymium magnets and has good light-tightness. After this procedure, the film’s ISO and size are entered via the GUI system.
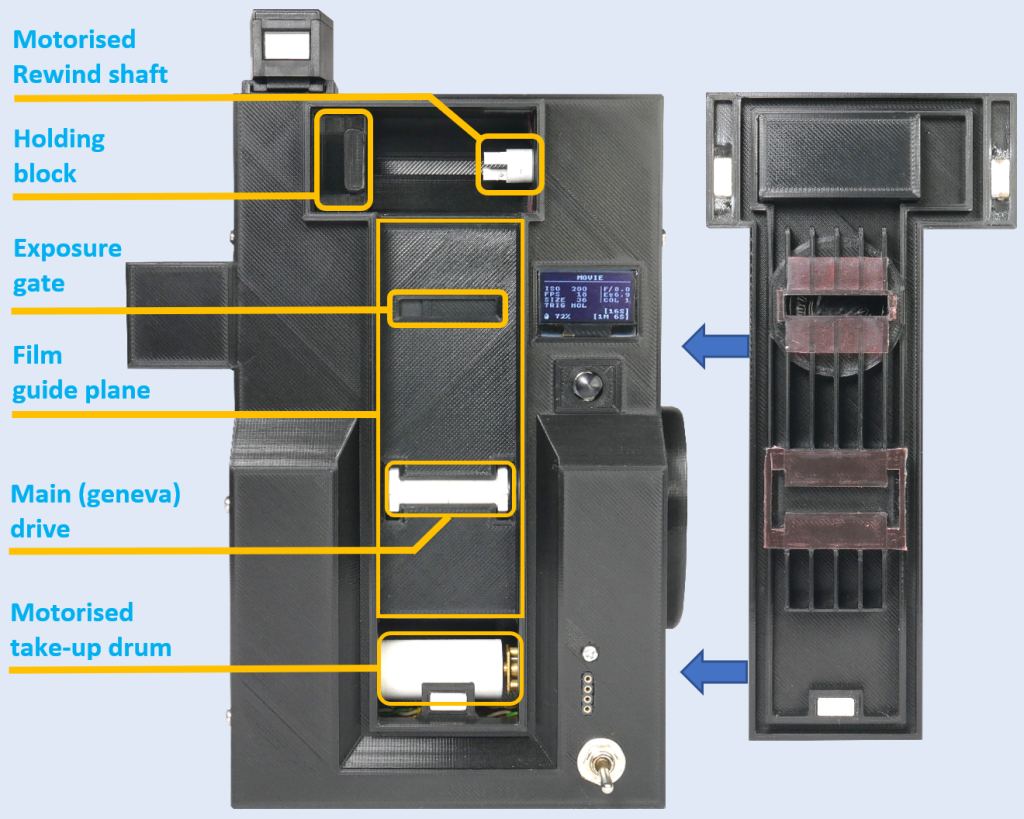
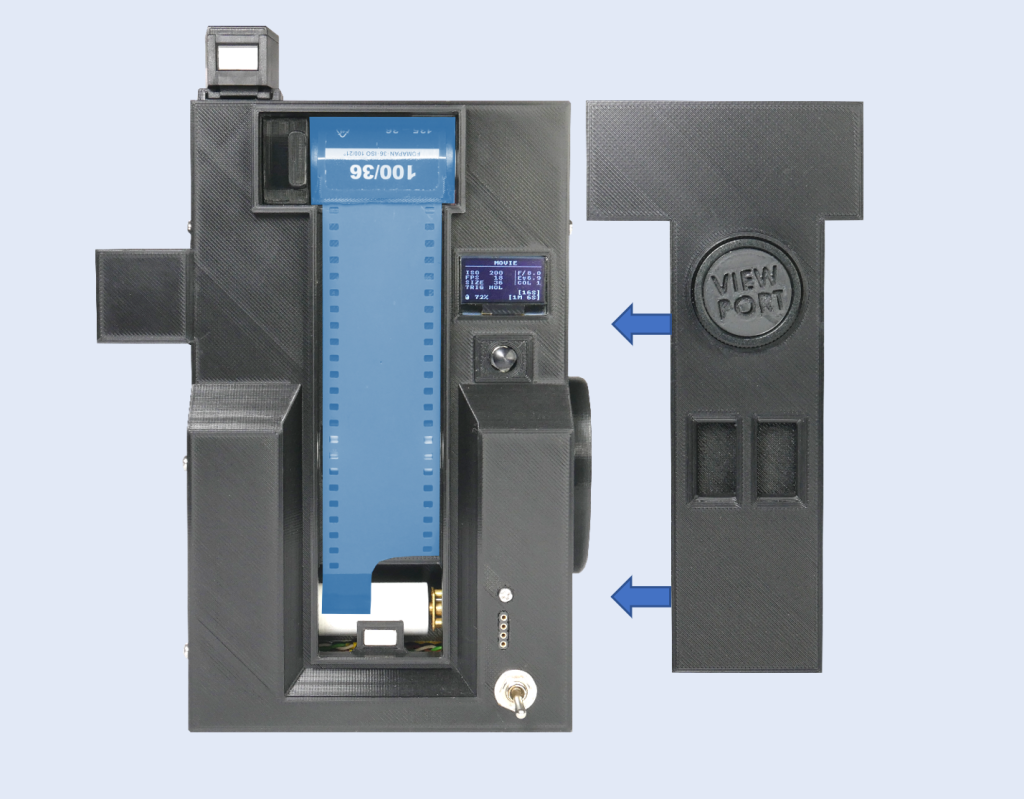
Now the user can choose between the 3 modes of shooting on film: movie, photo, and timelapse. All interchangeably on the same loaded film cartridge. The user can then set the framerate, shutter speed, and interval time, depending on the camera mode.
The camera is then pointed towards the desired scene to measure its luminance (or exposure value) via the built-in lightmeter sensor in order to obtain a displayed recommended lens F-stop.
If a lens focus check is needed, the user enables the option “Check Focus” under the GUI system. The shift motor positions the main lens to the middle of the film plane and opens the shutter. The user then checks the focus using the threaded 25mm magnification lens through the viewport on the film plane itself. This results in burned film area and a dim focus image. When finished, the option is disabled and the lens is returned to the previous track position.
FILM EXPOSURE
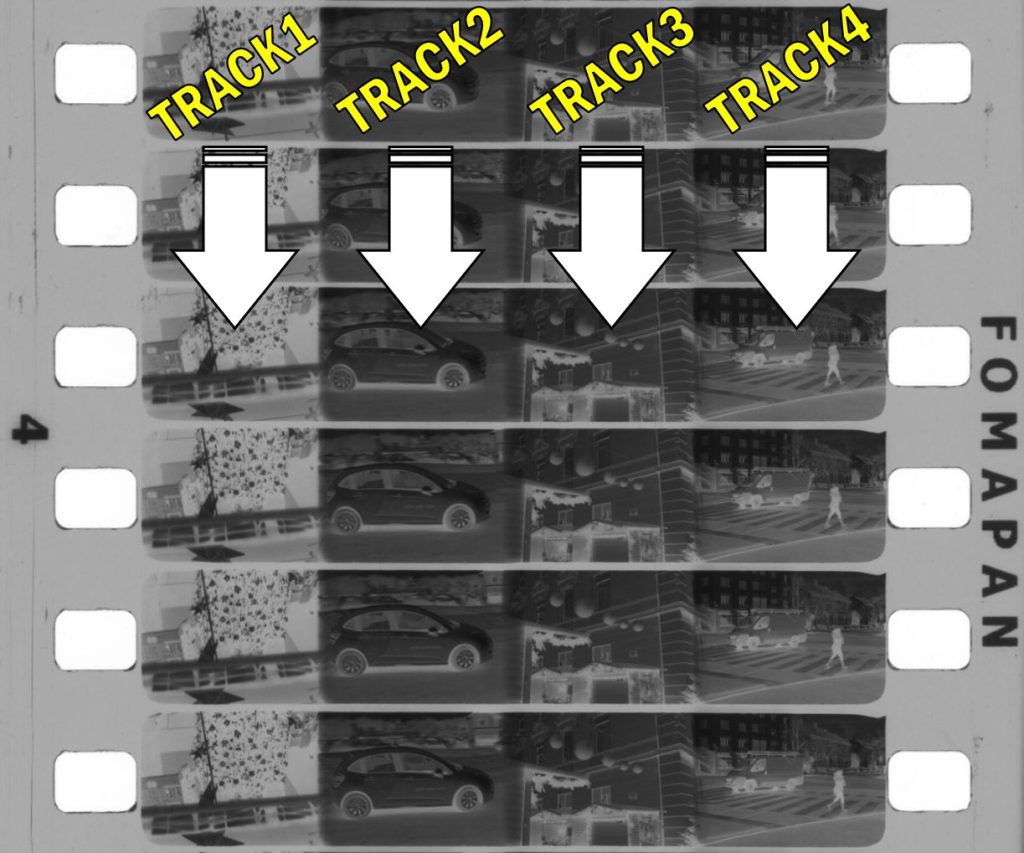
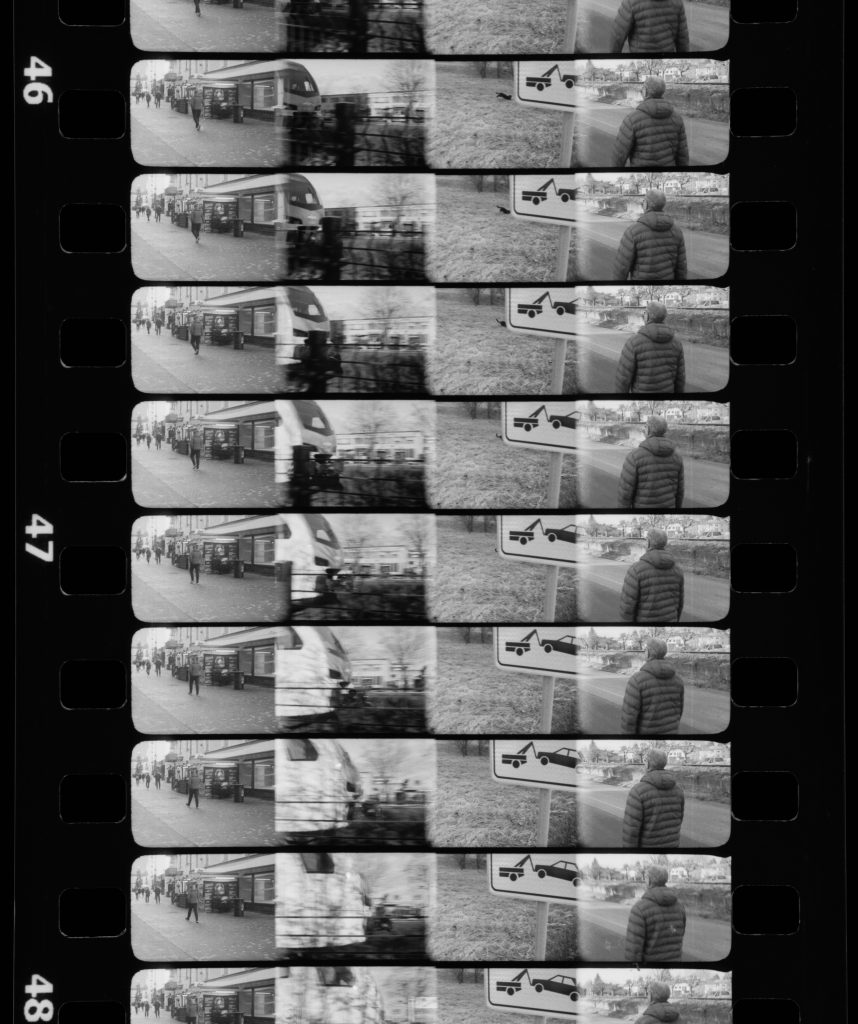
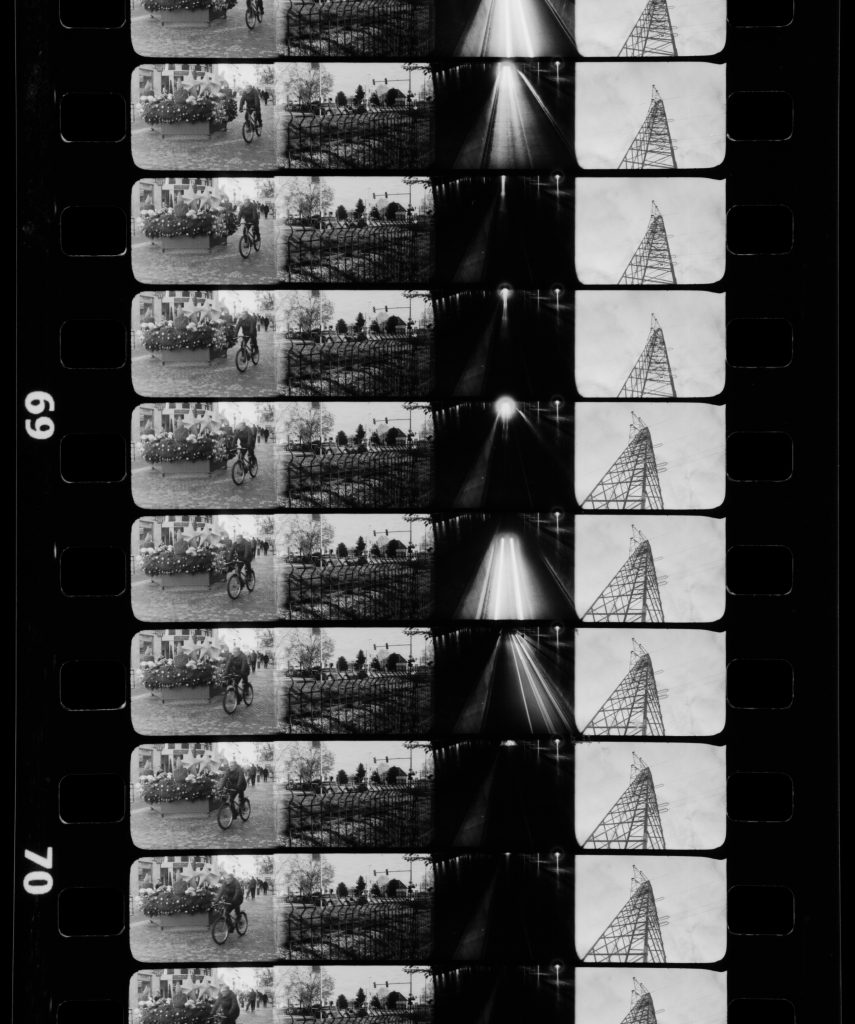
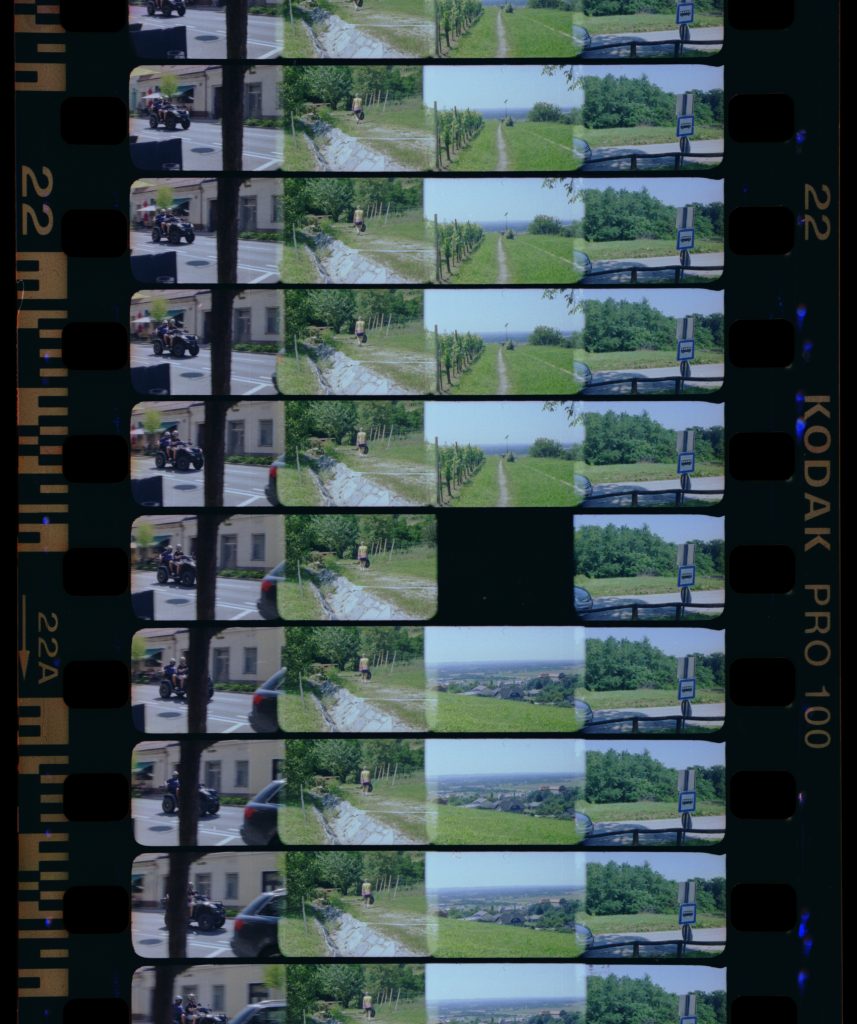
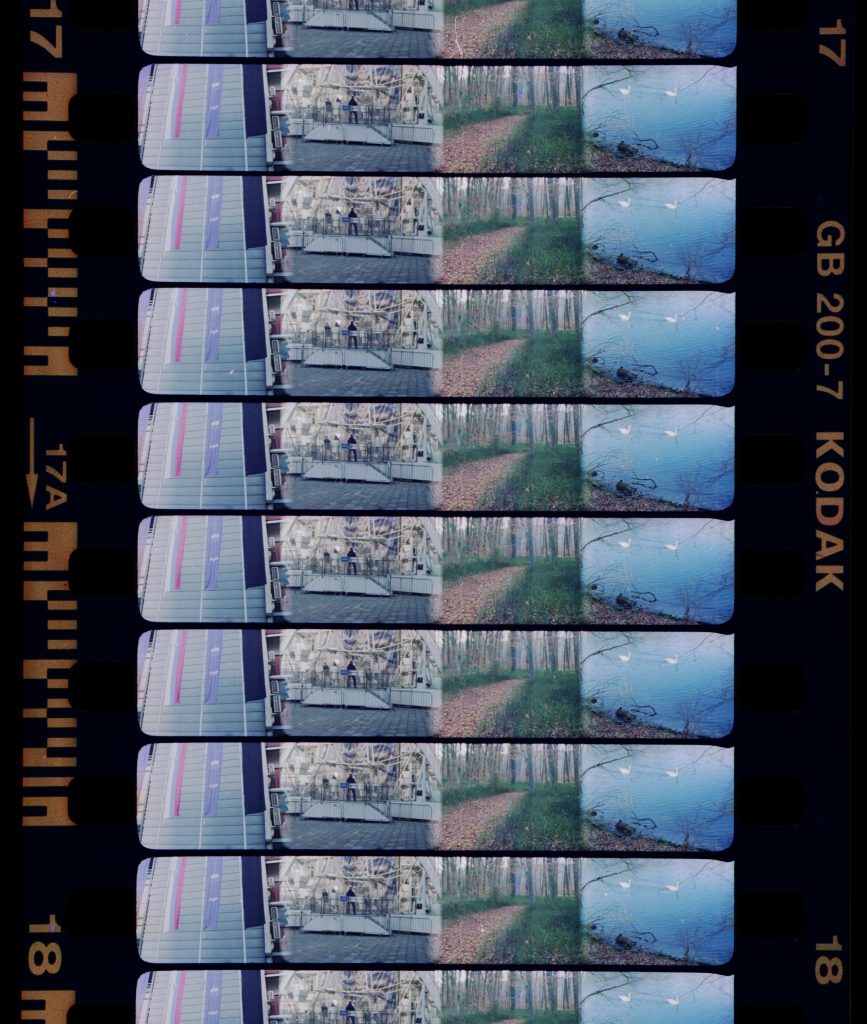
Film exposure is performed in a vertical 1-perf pulldown movement with 4-tracks shooting. Fully automatic frame advance with rewind and track shift. The user’s only job is to press the trigger button. This ensures the reliable and best usage of all horizontal film area between the sprocket holes. Effectively yielding 4 very long tracks in a total of 1200 frames per one 36-exposure size 35mm cartridge roll.
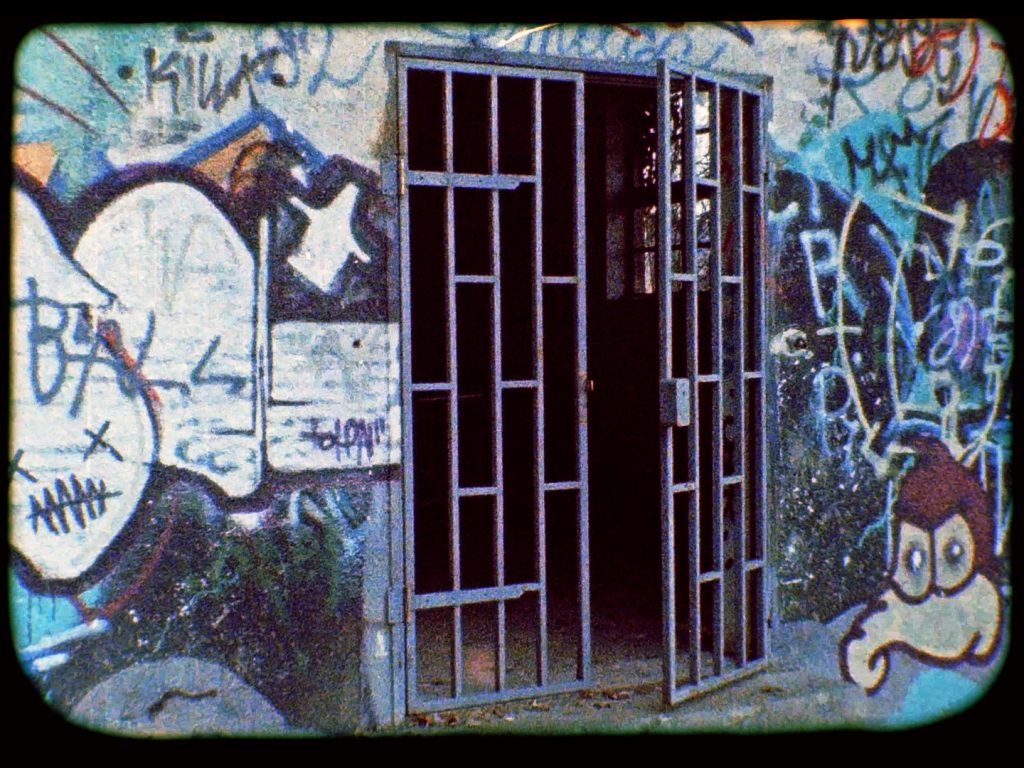
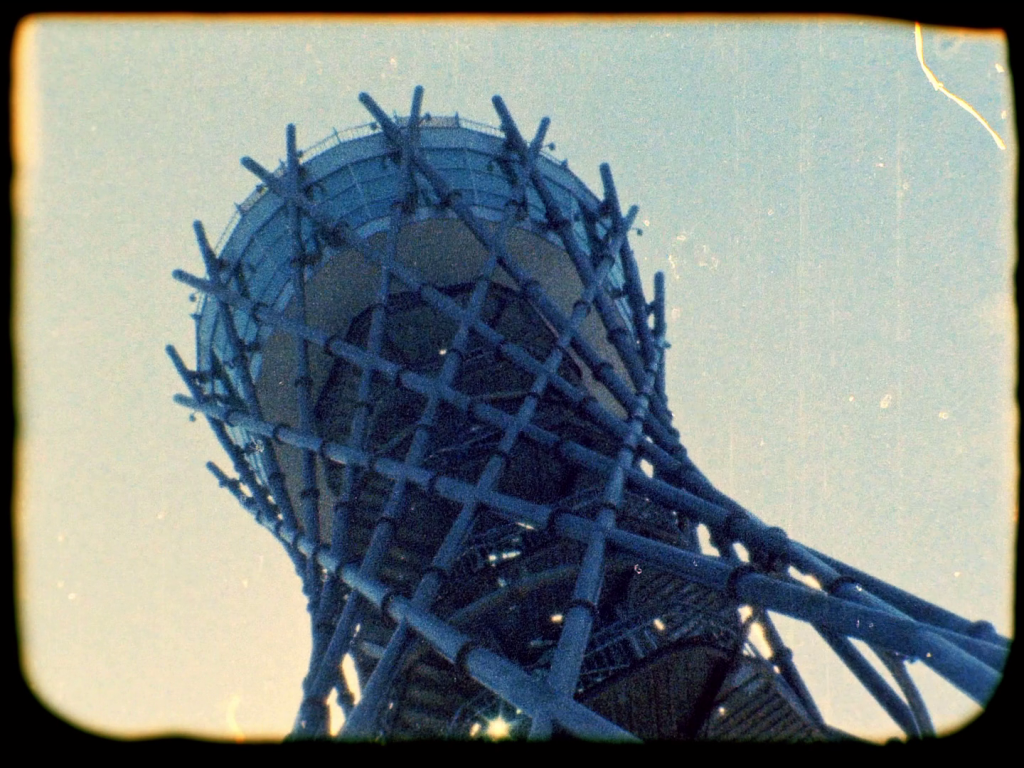
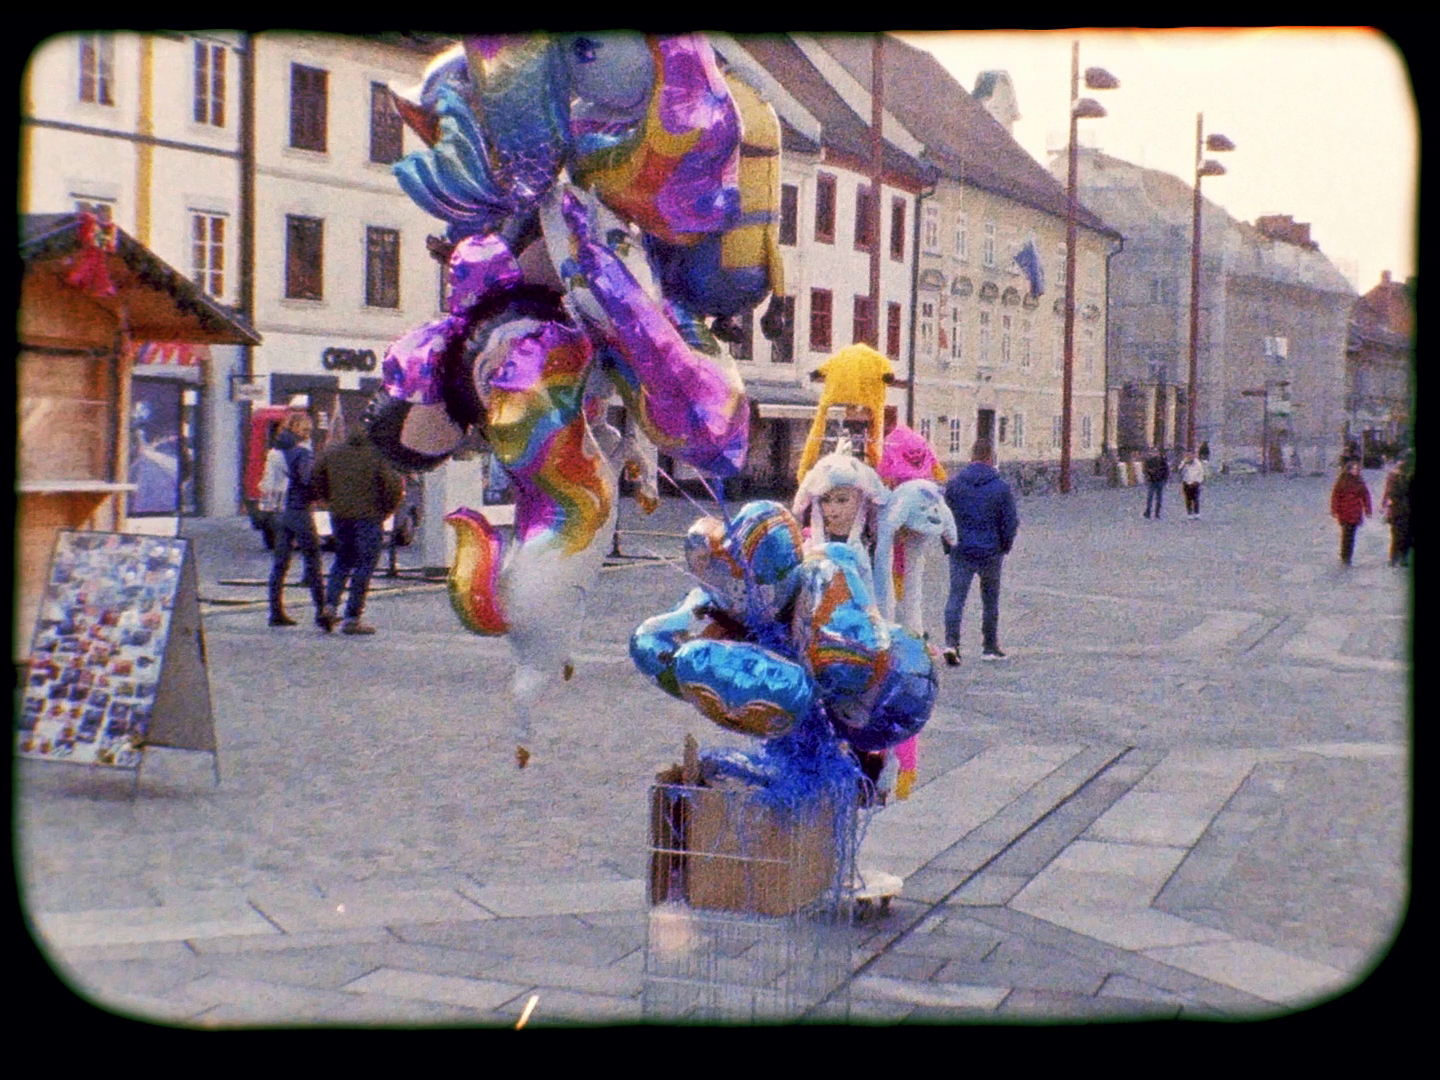
The end result is a 1.33:1 gate exposure size of 6.2 × 4.6 [mm], which scan area is ~25% larger than the Super8 format at 5.8 × 4.0 [mm]. This increment delivers a smaller film grain size and higher-definition frames, suitable for scanning at 1080p or higher.
FILM SCANNING
Most, if not all, analog motion picture film cameras only have a shooting function. After exposure and development, a different and more specialized machine is required, or even a lab service for scanning purposes. This, of course, increases the costs even more.
The OKTO35 Mk2 camera was designed in such a way that, in combination with an ordinary DSLR or Mirrorless camera also serves as a film scanner. The user loads the developed film cartridge back in the camera, swaps the front C-mount lens with a 25mm one for magnification, adds a backlight (high CRI LED, halogen …) to the opened view port, and sets the GUI into a scanner mode ready state.
The DSLR or a Mirrorless camera’s stock lens is then optically coupled with the 25mm lens. A wired connection is established to the DSLR trigger 2.5mm connector port. This ensures a steady and synced frame-by-frame scan. The end result can be a series of raw images or JPEGs that can be stitched together to form a very high-quality video at the post-production editing stage or in a DSLR/Mirrorless camera itself. In my case, I’ve used a Lumix G7 with a stock lens that creates a video from a series of taken images right from the get-go.
The scanning procedure is automatic for each exposure film track. The synced frame-by-frame image capture with high CRI LED or halogen light source provides the best flicker-free image quality. The OKTO35 MK2’s GUI displays the current status and remaining scanning time. In total, it takes about 20min of scanning time for one 35mm 36-exp cartridge.
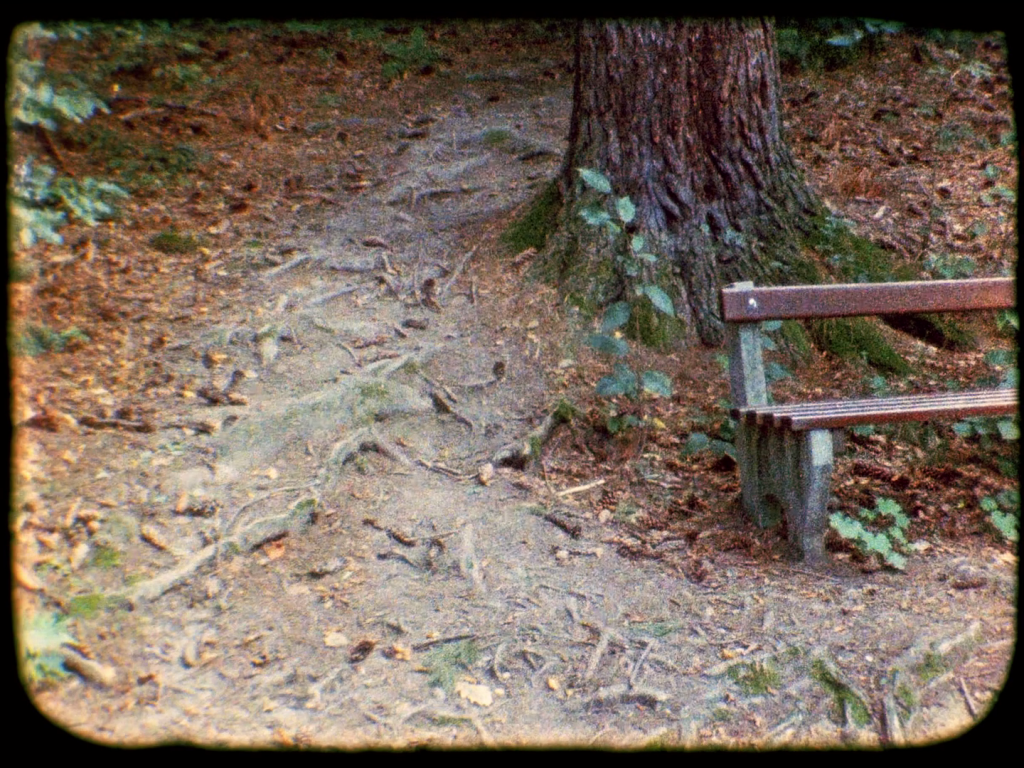
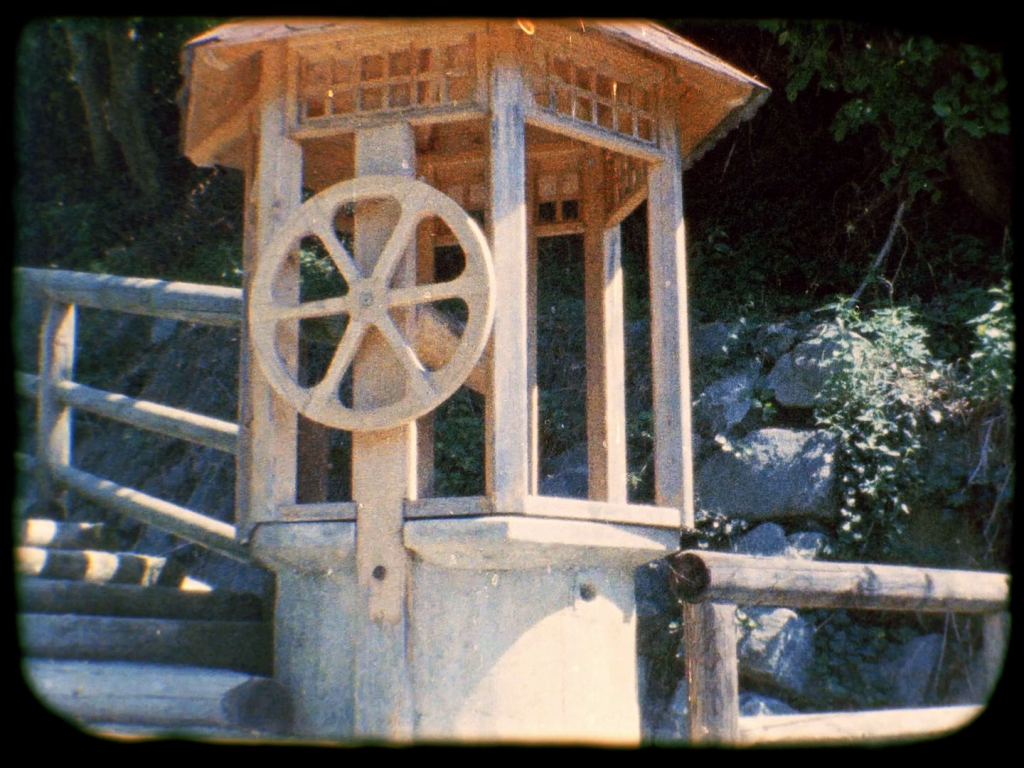
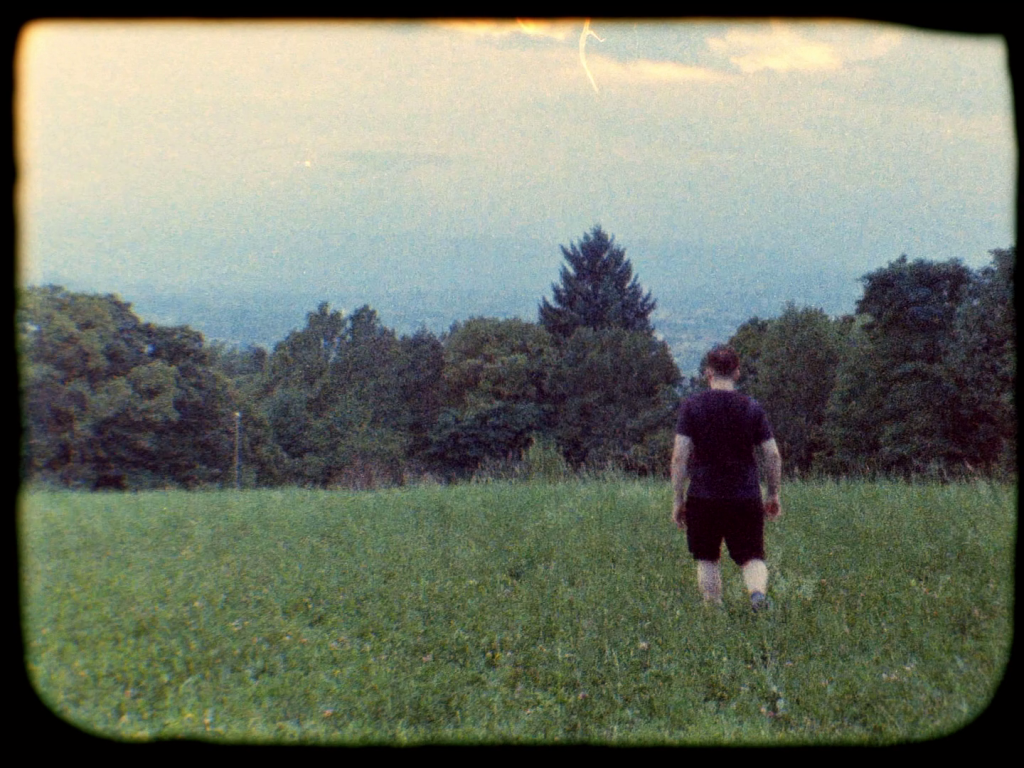
This B&W scanned footage [1min 7sec] fits in its entirety on ONE 36-exposure film roll.
No story behind it, just random bits mashed together and shot at 18fps.
This COLOR scanned footage [1min 7sec] fits in its entirety on ONE 36-exposure film roll.
No story behind it, just random bits mashed together and shot at 18fps.
SHOOTING COSTS
With the combination of home film development and scanning, the total costs per film roll can be substantially lowered. And quickly finished in a couple of hours!
One 36-exposure size 35mm film cartridge roll has a shooting capacity of 1 minute and 7 seconds @18fps. Comparing this to the Super 8 standard 50ft cartridge’s shooting time of 3 minutes and 20 seconds @18fps, we need only three 36-exposure size rolls to substitute one Super 8 50ft cartridge.
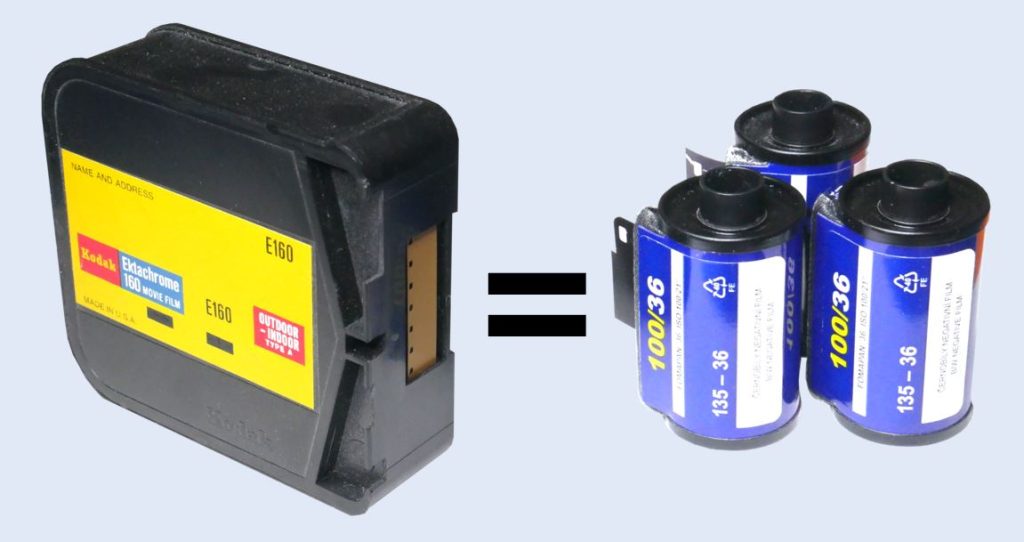
Time for some cost estimation analysis. All estimated costs, going from purchasing the film, development, to having it scanned, were calculated for 2025 relative to my location (Slovenia), but should also be a good-enough estimation in other countries as well. All estimated costs are in Euros (€).
A Black&White film comparison between one Kodak Tri-X 50ft cartridge and three Fomapan 100 35mm rolls. Each option gives us a total shooting time of 3 minutes and 20 seconds @18fps.
| B&W film | Purchasing | Development | Scanning | Turnaround time | Total cost |
|---|---|---|---|---|---|
| 1 × Super 8 50ft | ~44 € | ~27 € (commercial lab) | ~45 € (commercial lab) | 1 week or more | ~116 € |
| 3 × 35mm 36-exp roll | ~19 € | ~3 € (at home) | 0 € (at home) | few hours | ~22 € |
Using just three 35mm film rolls instead of one Super 8 cartridge gives us a total cost reduction of about 80%.
| B&W film | Total estimated cost per 10 min shooting time @18fps |
|---|---|
| Super 8 50ft | ~348 € |
| 35mm | ~66 € |

And now a color cost comparison between one Kodak 50D Vision3 50ft cartridge and three Kodak Pro Image 100 35mm rolls. Each option gives us a total shooting time of 3 minutes and 20 seconds @18fps.
| Color film | Purchasing | Development | Scanning | Turnaround time | Total cost |
|---|---|---|---|---|---|
| 1 × Super 8 50ft | ~45 € | ~27 € (commercial lab) | ~45 € (commercial lab) | 1 week or more | ~117 € |
| 3 × 35mm 36-exp roll | ~32€ | ~6 € (at home) | 0 € (at home) | few hours | ~38 € |
Using just three 35mm film rolls instead of one Super 8 cartridge gives us a total cost reduction of about 65%.
| Color film | Total estimated cost per 10 min shooting time @18fps |
|---|---|
| Super 8 50ft | ~351 € |
| 35mm | ~114 € |

If the user chooses to shoot on bulk-loaded film with reusable 35mm cartridges, the cost reduction can be even greater! With the B&W option, the total price is estimated to be ~42€ per 10 min shooting time @18fps.
A respectable ~90% price reduction!
And also as a bonus, the user can also shoot with other different types of rolls such as orthochromatic, aerochrome, limited edition, experimental.
| Frames/sec | Shooting time per one 36-exp 35mm film roll |
|---|---|
| 10 | 2 min 0 sec |
| 12 | 1 min 40 sec |
| 16 | 1 min 15 sec |
| 18 | 1 min 7 sec |
| 24 | 50 sec |
CAN I TO BUY THIS CAMERA?
Unfortunately no. The OKTO35 Mk2 is only a working prototype with lots of room for improvement. It still needs hardware and software bug fixes, along with external design and internal parts cost optimizations. Consequently, it isn’t yet market-ready or for sale.
Fortunately, the OKTO35 Mk3 camera, which I’m currently developing, will be ready for first beta testers and will be a lot closer to a final product, along with a more refined and cost-optimized design and a reliable product.
THE SUCCESSOR
Thanks to all your project’s feedback and interest from my OKTO35 Mk2’s YouTube video, I’ve decided to continue with the project’s further development and build my third camera version OKTO35 Mk3.
This will be a new and improved version, ready for the first beta testers. With parts/cost optimization, a more refined design, and a better overall user experience. You can follow the progress here and on my YouTube channel.